


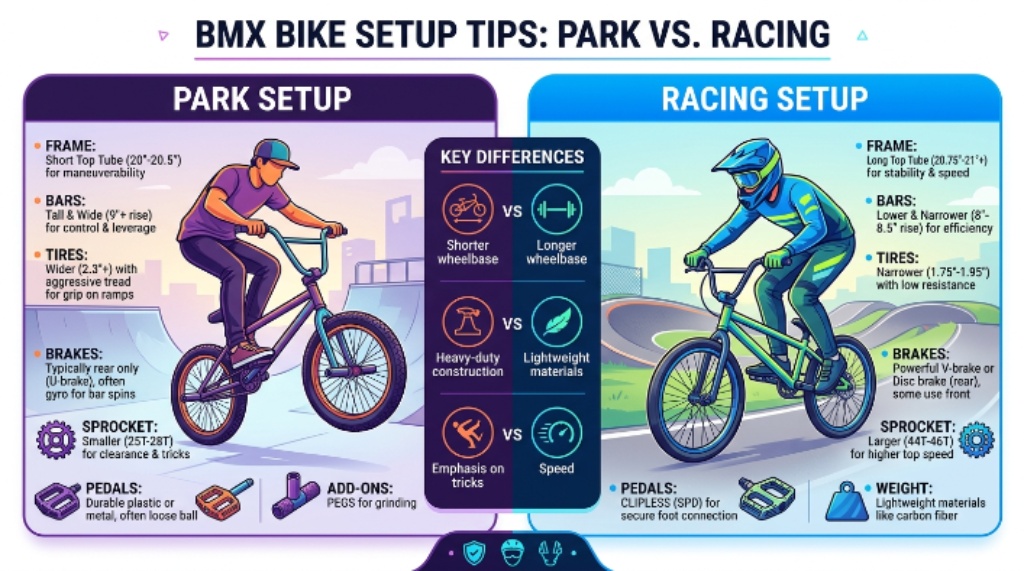
Setting up a BMX bike correctly depends on where you ride and how you move the bike. A street setup favors control, while park and racing setups prioritize different handling traits. Most BMX bikes use 20 inch wheels, while race bikes often use larger wheel options for taller riders. Tire pressure can also range widely, with many BMX riders using roughly 35 to 65 PSI depending on terrain and riding style.
Start With Your Riding Style
Before changing parts, decide how you spend most of your riding time. Your riding environment determines the setup more than any single component does. A street rider needs stability around obstacles, while a park rider needs quick response. Meanwhile, a racer needs efficient power transfer and predictable handling at speed.
Think about your usual riding session:
- Street: Rails, ledges, stairs, banks, gaps, and rough pavement.
- Park: Ramps, bowls, quarter pipes, transitions, and smooth concrete.
- Racing: Dirt tracks, jumps, berms, rhythm sections, and high speed straights.
Your setup should support your most common movements. Therefore, avoid copying another rider’s bike without understanding their riding demands.
Check the BMX Frame and Geometry
Frame geometry affects how the bike responds when you pull, turn, jump, or land. Beginners should focus on a comfortable frame rather than chasing aggressive geometry. A balanced frame makes basic skills easier to learn and control.
Pay attention to these frame measurements:
- Top tube length: Influences cockpit space and rider comfort.
- Head tube angle: Affects steering response and stability.
- Chainstay length: Changes rear wheel control and manual behavior.
- Bottom bracket height: Influences pedal clearance and handling.
A shorter rear end can make manuals and spins feel easier. However, a longer rear end can provide greater stability during fast riding.
Match Frame Size to Your Height
Frame sizing should begin with your height and riding preference. Most BMX bikes use a 20 inch wheel diameter, but frame lengths vary considerably.
A general starting point looks like this:
- Shorter riders: Consider frames around 20 inches or slightly shorter.
- Average riders: Consider traditional 20.5 to 21 inch top tube lengths.
- Taller riders: Consider frames above 21 inches for additional cockpit room.
Treat these measurements as starting points rather than strict rules. Your reach, riding position, and personal comfort matter just as much.
Set the Handlebar Position
Handlebar height strongly affects comfort, steering, and front wheel control. Start with a moderate position that allows relaxed elbows and controlled weight shifts. Then make small adjustments after several rides.
For street riding, a slightly higher bar can provide comfortable control during manuals. Park riders often prefer a balanced height that supports spins and transitions. Racing riders may use a lower position for a more aggressive stance and improved aerodynamics.
Do not make large changes immediately. Instead, adjust the bar slightly and test the bike through familiar movements.
Check Handlebar Rotation
Handlebar rotation changes the relationship between your wrists and the bike. A neutral position usually gives beginners the easiest starting point. Excessive rotation can create awkward wrist angles and affect control.
Stand beside the bike and inspect the bars from the side. Keep the position consistent with your natural riding posture.
Adjust the Seat for Your Riding Style
BMX seats rarely provide the same role as traditional bicycle seats. Many riders keep them low because BMX riding involves frequent body movement. However, the correct height still depends on your riding style.
Street riders usually benefit from a low seat that stays out of the way. Park riders often use similar positioning for tricks and spins. Racing riders may raise the seat slightly when they need more support during longer track sections.
Set the seat low enough for movement without creating unnecessary contact. Then check that the seat remains secure before riding.
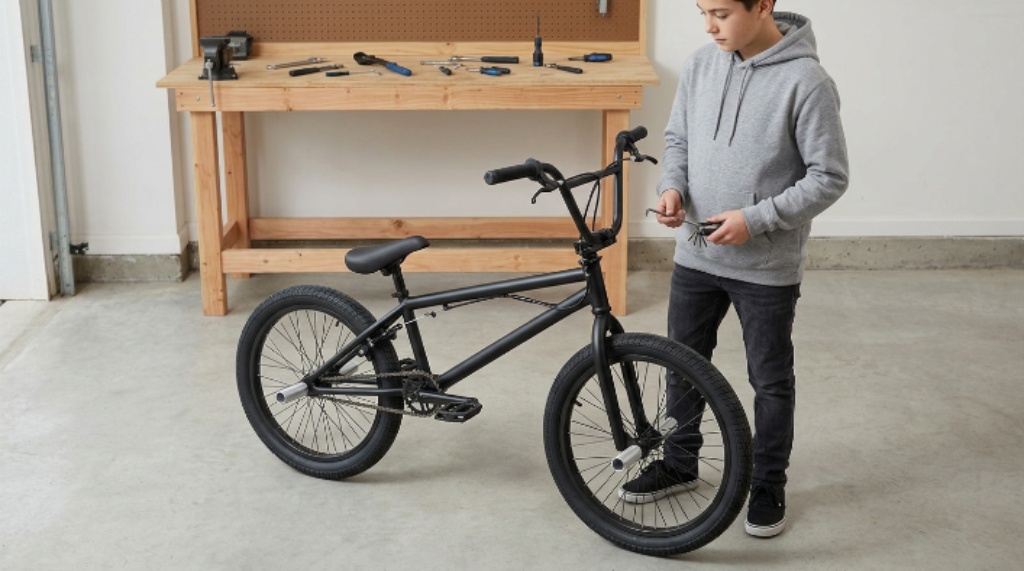
Set Tire Pressure Correctly
Tire pressure changes traction, comfort, rolling speed, and landing behavior. Therefore, tire pressure deserves more attention than many beginners give it.
Start within the pressure range printed on your tire sidewall. Then adjust gradually according to your terrain, tire construction, and riding preferences.
Street riding often benefits from a balanced pressure that handles rough pavement. Park riding usually works well with firm tires that respond quickly on smooth surfaces. Racing can favor higher pressure when riders prioritize speed and precise handling.
Use these signs to guide adjustments:
- Too much pressure: The bike feels harsh and loses some surface grip.
- Too little pressure: The tire feels slow and may bottom out during hard landings.
- Balanced pressure: The bike feels controlled, predictable, and responsive.
Check tire pressure before important sessions. Temperature changes can also affect pressure, so regular checks make sense.
Choose Tires for Your Terrain
Tire design should match your riding surface. Smooth park surfaces allow riders to use tires designed for quick rolling and predictable grip. Street riding may require stronger construction for rough pavement and repeated impacts.
Racing tires often focus on low rolling resistance and dirt traction. They also use tread patterns designed for track conditions.
When replacing tires, consider:
- Surface type
- Tire width
- Sidewall strength
- Tread pattern
- Recommended pressure
- Wheel compatibility
Avoid choosing tires based only on appearance. The right tire should complement your riding surface and riding technique.
Build a Street BMX Setup
Street riding places repeated demands on wheels, tires, cranks, and frames. You need a bike that handles impacts while remaining easy to move.
A practical street setup usually includes:
- Strong wheels with reliable spoke tension.
- Durable tires suited to pavement.
- Compact gearing for controlled acceleration.
- A low seat position for trick clearance.
- Comfortable handlebars with secure grips.
- Reliable brakes when your riding style requires them.
Street riders often use smaller gearing because it can make acceleration and technical riding easier. However, gearing should still match your local terrain and personal strength.
Prioritize Control Over Lightweight Parts
Beginners sometimes remove parts simply to make the bike lighter. That approach can create unnecessary compromises. Strong components often provide more value when you are still developing landing technique.
Instead, remove only equipment that interferes with your riding. Keep components that improve safety, reliability, or control.
Build a Park BMX Setup
Park riding rewards smooth handling and predictable movement. Your bike should feel easy to lift, rotate, and redirect without becoming unstable.
A useful park setup focuses on:
- Responsive steering.
- Smooth rolling tires.
- Comfortable handlebar positioning.
- Reliable wheel construction.
- Secure grips.
- A compact and balanced cockpit.
Park riders often perform repeated jumps, spins, and transitions. Therefore, a predictable setup can help you repeat movements consistently.
Keep the Bike Balanced
Avoid extreme changes to the front or rear of the bike. A balanced setup makes transitions between tricks easier to manage. It also helps beginners develop consistent body positioning.
Test the bike on familiar park features first. Then adjust one component at a time based on what feels difficult.
Build a Racing BMX Setup
Racing requires a different approach because speed and efficiency become major priorities. A race bike should respond quickly without feeling nervous. Every setup change should support acceleration, cornering, jumping, or control.
A practical racing setup may include:
- Track appropriate tires.
- Firm tire pressure within manufacturer limits.
- Efficient gearing for the track.
- A stable racing position.
- Strong wheels with appropriate weight.
- Reliable brakes and properly adjusted controls.
Race gearing deserves particular attention. A harder gear can improve speed on straights, while an easier gear can help acceleration. Your local track and strength should determine the final gearing choice.
Adjust for the Track
Do not assume one race setup works everywhere. Tracks can contain different jump sizes, surfaces, corners, and rhythm sections. Therefore, adjust your bike according to the course.
A smoother track may reward lower rolling resistance. A rougher track may require more grip and a more forgiving tire setup.
Set the Brakes Correctly
Brake setup affects control and confidence. Many BMX riders use a rear brake, while some disciplines and riding preferences require different arrangements.
If your bike has brakes, check the following:
- Brake pads contact the rim correctly.
- Brake levers feel firm.
- Cables move smoothly.
- Pads do not rub during normal riding.
- Fasteners remain secure.
A poorly adjusted brake can reduce control or create unwanted resistance. Test the brake at low speed before attempting jumps or technical riding.
Check the Crank and Pedal Setup
Your crankset transfers your leg power into the rear wheel. It also affects durability and pedaling feel. Therefore, inspect the crank and pedals regularly, especially after hard riding.
Make sure the following components remain secure:
- Crank bolts
- Pedal threads
- Chainring hardware
- Bottom bracket components
- Chain tension
A loose crank can become dangerous quickly. Stop riding if you notice unusual movement, clicking, or excessive play.
Set the Chain Tension
BMX bikes often use a relatively tight chain because riders need consistent power delivery. However, excessive tension can create unnecessary stress on drivetrain components.
Check the chain by moving the crank slowly. Look for smooth movement without excessive slack or binding.
A correctly tensioned chain should move freely while remaining secure. If adjustment feels uncertain, have an experienced mechanic inspect it.
Choose Gearing for Your Riding
Gearing changes how quickly your BMX accelerates and how easily it maintains speed. Beginners should use gearing that feels manageable rather than chasing maximum speed.
Street riders often value quick acceleration and controlled pedaling. Park riders may care less about sustained speed because tricks dominate their sessions. Racing riders need gearing that matches track length, starts, jumps, and personal power.
Try small gearing changes rather than making dramatic adjustments. Record how each change affects acceleration and control during familiar riding conditions.
Adjust the Grips and Controls
Small cockpit details can make a surprisingly large difference. Grips should feel secure without forcing your hands into an awkward position. Brake levers should remain easy to reach without changing your natural wrist position.
Inspect the grips for:
- Slipping
- Excessive wear
- Torn ends
- Hardened rubber
Replace damaged grips before they affect your control. Likewise, tighten control hardware without overtightening delicate components.
Test Your Setup Before Riding Hard
Never make several major changes immediately before a demanding session. Test each adjustment separately so you can understand its effect.
Use this simple test sequence:
- Check every fastener.
- Confirm tire pressure.
- Test the brakes.
- Check the chain.
- Ride slowly for several minutes.
- Perform basic turns and manuals.
- Test jumps only after everything feels stable.
This process reduces surprises and makes troubleshooting much easier. More importantly, it helps you understand how your BMX responds to setup changes.
Common BMX Setup Mistakes
Beginners often focus on expensive components before fixing basic adjustments. However, correct tire pressure, bar position, chain tension, and wheel condition usually matter first.
Watch for these common mistakes:
- Copying another rider’s setup exactly.
- Using incorrect tire pressure.
- Running an uncomfortable bar height.
- Ignoring loose hardware.
- Making several changes simultaneously.
- Choosing parts without considering riding terrain.
- Prioritizing weight over durability.
Each mistake can make the bike harder to control. Fortunately, most problems require simple adjustments rather than expensive upgrades.
Create a Simple Setup Routine
A repeatable inspection routine keeps your BMX predictable. Perform a quick check before every serious riding session.
Use this five minute routine:
- Check both tires.
- Squeeze the brake lever if fitted.
- Inspect the chain tension.
- Test the cranks and pedals.
- Check the bars and stem.
- Spin both wheels.
- Look for cracks or unusual movement.
Additionally, inspect the bike more carefully after hard crashes. Damage can hide around welds, rims, forks, cranks, and handlebars.
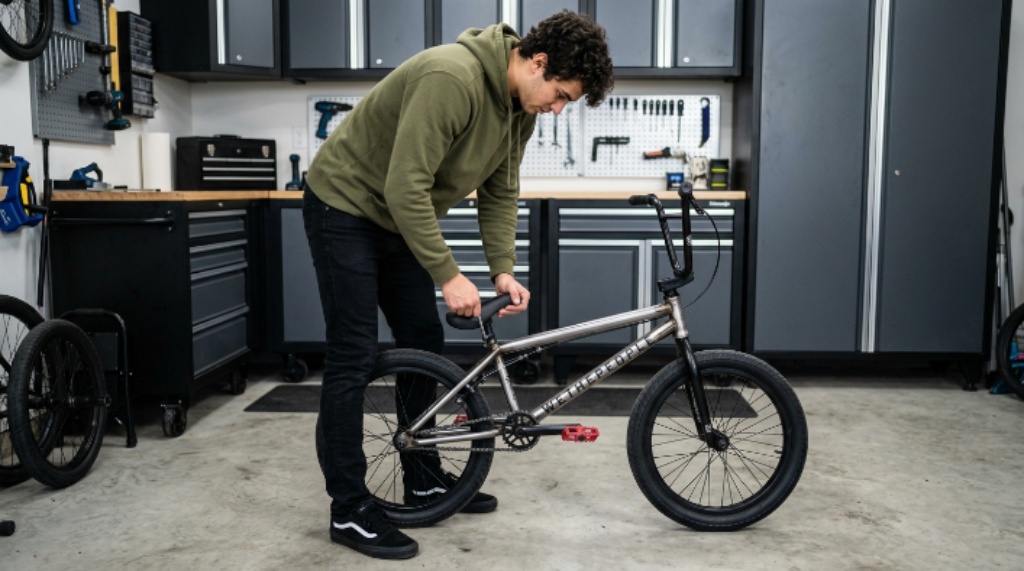
How to Fine Tune Your BMX Over Time
Your first setup does not need to feel perfect. Your riding skills will change as you gain confidence, strength, and technique.
Keep notes about useful adjustments. Record tire pressure, gearing, bar position, and the riding conditions that produced the best results.
Then change one variable at a time. This approach turns setup changes into useful feedback instead of guesswork.
Quick Setup Guide by Riding Style
Use this comparison as a practical starting point:
| Riding style | Main priority | Useful setup direction |
| Street | Control and durability | Strong wheels, balanced pressure, compact gearing |
| Park | Responsiveness and balance | Smooth tires, balanced cockpit, controlled pressure |
| Racing | Speed and efficiency | Track tires, suitable gearing, firm pressure |
These guidelines provide a starting point rather than a universal formula. Your height, skill level, local terrain, and riding technique still influence the final setup.
Final Safety Check
Before every session, inspect the parts that can directly affect control. Small problems can become serious when you combine speed, jumps, and hard landings.
Check the frame, fork, bars, stem, wheels, tires, cranks, pedals, chain, and brakes. If you find cracks, severe damage, or loose components, stop riding until you resolve the issue.
Frequently Asked Questions
How should a beginner set up a BMX bike?
Start with comfortable frame geometry, moderate bar height, suitable tire pressure, and secure controls.
What BMX setup works best for street riding?
Street riding generally benefits from durable wheels, suitable tires, compact gearing, and a low seat position.
How should I set up a BMX bike for park riding?
Use a balanced cockpit, responsive steering, suitable tire pressure, and components that support repeated tricks.
What makes a BMX bike suitable for racing?
A racing BMX needs track suitable tires, appropriate gearing, efficient positioning, and predictable handling.
How often should I check my BMX setup?
Perform a quick inspection before every serious session and inspect the bike after significant crashes.
Conclusion
The best BMX setup matches your riding rather than following someone else’s formula. Start with your terrain, then adjust geometry, bars, tires, gearing, seat height, and controls gradually. Most importantly, test every change before riding aggressively.
Build your setup around control first, then refine it as your skills improve. With regular checks and thoughtful adjustments, your BMX can feel more predictable, comfortable, and capable on every session.

